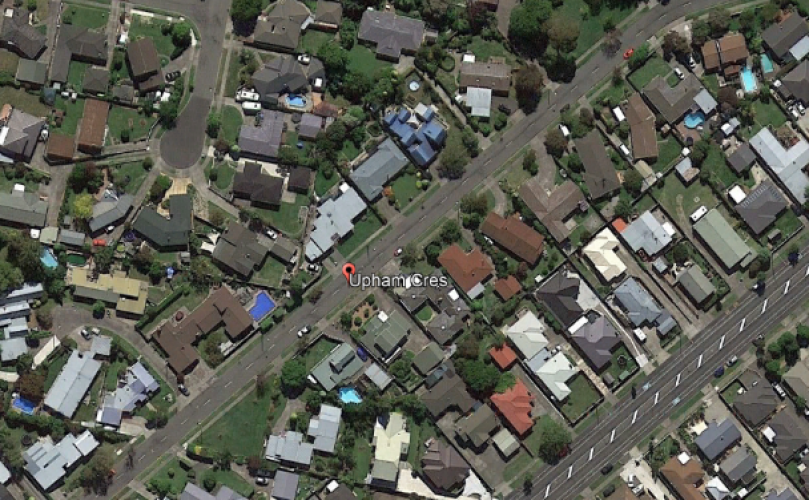
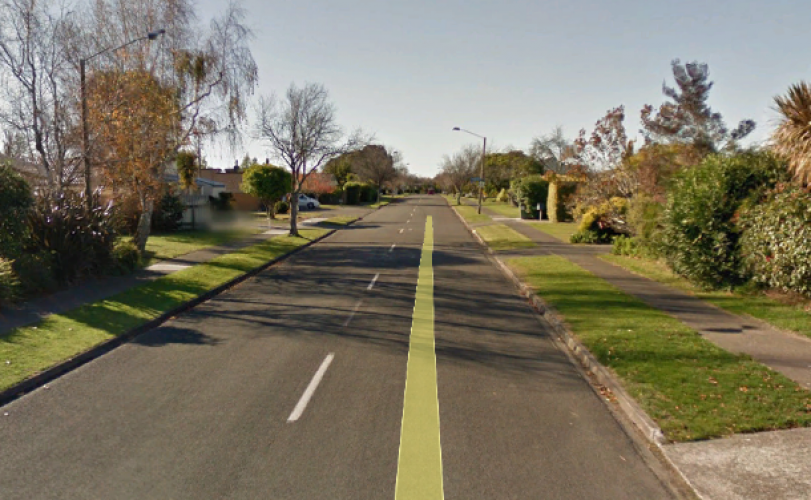
Upham Crescent Taradale, Napier, street scene 2018
Reason for the name
This street was named in honour of Captain Charles Hazlitt Upham VC and Bar
There are many streets in Taradale Napier that are named after Victoria Cross winners from World War 1 and World War 2. Captain Upham is the only combatant person to win the award twice.
Author: Poppy Places Trust
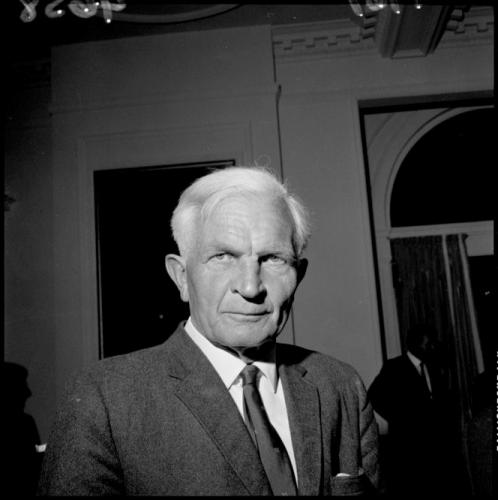
About Captain Charles Hazlitt Upham
Charles Hazlitt Upham was born in Christchurch on 21 September 1908, the only son of John Hazlitt Upham, a lawyer, and his wife, Agatha Mary Coates. Living in Gloucester Street, the young family was raised in a traditional English manner, with a nurse, housemaid and gardener. He boarded at Waihi School, South Canterbury, between 1917 and 1922, and at Christ’s College, Christchurch, from 1923 until 1927. From an early age he was a quiet and unusually determined boy, and, although not a physically strong boy, he on more than one occasion intervened to defend schoolmates who were being bullied.
Charles was keen to pursue a farming career, enrolling at Canterbury Agricultural College in 1928, gaining firsts in veterinary science and economics, and leaving the college in 1930 with a Diploma of Agriculture. For the next six years he worked on high country sheep stations in Canterbury as a shepherd, musterer and farm manager. It was this tough hill country that built Charles into a man of wiry strength and physical endurance. In 1937 he joined the Valuation Department as assistant district valuer in Timaru, and the following year he became engaged to Mary (Molly) Eileen McTamney after meeting her on a Saturday at the Christchurch races. In 1939 he returned to Lincoln to complete a diploma in valuation and farm management.
Enlisting 3 days before his birthday in September 1939, Charles marched into Burnham Camp as part the 20th Battalion of the New Zealand Army’s First Echelon, under the command of Lieutenant Colonel Kippenberger. Having his former Principal, Professor Eric Hudson, vouch for him, and the fact that he had formerly been in the Territorials, helped with his being promoted to Lance Corporal, then Sergeant in January 1940, six days before embarkation overseas.
After arriving in Egypt, Charles spent several months training with the battalion in the Western Desert before he was selected for the Officer Cadet Training Unit in August. It was here that his rejection of what he believed were outdated and obsolete ideas earnt him a C pass and resulted in his graduating at the bottom of the class. Now Second Lieutenant Upham returned to the 20th Battalion where he took command of the West Coasters, establishing a reputation as an officer who took care of the men under his command, leading by example and being proficient with all types of infantry weapons. While his senior commanders also stated that he was “obstinate, pugnacious, independent, blunt, tactless…”, they also recognised that he was “a superb junior leader”.
Charles was sent to Greece as part of Lustre Force in March 1941, but his platoon saw little action on the mainland. It was here that he picked up a severe case of dysentery, leaving him unable to walk at times, which was to plague him throughout the campaign. After withdrawing to Crete the 20th Battalion was placed in key positions around Maleme airfield. While Upham’s 15 platoon of C Company fought off an incursion of paratroopers landing between 19th and 20th battalions, the airfield was taken. Counterattacking on May 22, the platoon came under heavy fire while crossing an open field, whereupon:
As we kept up the fire the platoon officer [Upham] cautiously approached crawled around to the side…When he got round behind the tree [Upham] jumped to his feet and hurled three Mills bombs, one right after another, into the nest and then jumped forward with his revolver blazing. Single-handed he wiped out seven Jerries with their Tommy guns and another with a machine-gun.
As C Company advanced towards Maleme airfield, this scene was to be repeated multiple times throughout the day as the platoon cleared houses in Pirgos village, Charles always in front with grenade and pistol.
While the 20th Battalion now had sight of their objective, German reinforcements were by now overwhelming, forcing them to withdraw. Charles and his sergeant, David Kirk, volunteered to advance through 600 meters of enemy held territory to tell the now isolated D Company that they were to withdraw. After shooting 2 more Germans, Charles and Kirk rescued isolated men from B Company, bringing them back to the battalion’s new position. Not yet content with the day’s actions, Charles led his platoon back to Pirgos village twice and collected the wounded, hauling the injured men back to friendly lines on wooden doors and improvised stretchers. Later that afternoon, after being injured in the shoulder by a piece of shrapnel and having Sergeant Kirk dig it out with a pocket knife, Charles refused to leave his post when his commanding officer insisted he attend the regimental aid post.
The following days were no less eventful – on 28May as the 20th Battalion defended Galatas Charles was blown over by a mortar shell and had a machine gun bullet hit him and lodge near his ankle. Still refusing aid, Charles left his platoon in the hands of Sergeant Kirk after receiving the order to withdraw in order to warn others. As he advanced, he came across 2 Germans who advanced and fired upon him. Feigning death, the injured lieutenant crawled to a tree, propped his rifle on a fork in a tree to make maximum use of his uninjured hand, and proceeded to shoot both, with the second German soldier falling on Charles’ rifle as he died.
After retreating across the mid-section of Crete to Sphakia, allied forces awaited evacuation from the island back to Egypt. Attempting to flank the exhausted troops, 50 German soldiers managed to claim the high-ground above the evacuation beaches and poured fire into the troops below, attempting to sow panic amongst them. Fatigued, wounded and still suffering the effects of dysentery, Charles led a firing party over steep terrain to the top of the ravine, whereupon they fired down on the infiltrating party, wiping them out. As the evacuation continued, Charles boarded a ship after 9 days of continuous combat, Lieutenant Colonel Kippenberger afterwards describing him as “a walking skeleton”.
After returning to Egypt, it was Lieutenant Colonel Kippenberger who would draft the Victoria Cross recommendation for Charles Upham. Documentation from multiple witnesses was collected, including Captain Fountaine, who stated:
…Upham showed a total disregard for his own safety, very seldom used cover as he was always moving around his platoon cheering them on and his coolness, leadership and unremitting attention to his men were an inspiration not only to his men but to the whole company and every one with whom he came in contact.
While there was great fanfare when the award was gazetted on 10 October 1941, Upham was genuinely distressed to be singled out for the award, believing that many others deserved it more than he did. Only by viewing the award as recognition of the bravery and service of the entire unit could he cope the fame that went with it.
After a break from the frontlines and an extended period of rest in Lebanon and Syria in late 1941, Charles was kept out of the next battle, Operation Crusader, which 20th Battalion was involved in. This proved fortuitous, as the entire battalion was overrun by Axis forces on Belhamed Ridge. In reforming the battalion in June 1942, after Rommel’s breakthrough of the Eighth Army’s defences and offensive into Egypt began, Charles was promoted to Captain and put in command of C Company. Driving back from Syria the 2nd New Zealand Division passed an army in retreat, arriving at Minqar Qa’im in late June where they were to act as a mobile force. However, by 26 June the 21st Panzer Division and 90th Light Division had broken through the frontlines and surrounded the division. The situation became desperate after Lieutenant General Freyberg was wounded and the artillery began to run low on ammunition. In order to breakout of the encirclement, 19th Battalion was tasked with being the spearhead of the assault, with the 20th Battalion defending the left flank.
As the withdrawal from Minqar Qa’im began, Charles and his platoon were in the thick of the fighting. Armed with a pistol and haversack full of grenades, Charles advanced through the German lines, destroying vehicle after vehicle with explosives and cutting down any survivors with the pistol. The breakout force managed to penetrate the enemy lines, allowing the bulk of the division to retreat and leaving behind a disorganised and chaotic German force. This action was to prove crucial to the survival of the entire Eighth Army, providing 3 days of respite and further time to prepare defensive lines at El Alamein.
In mid-July the 2nd New Zealand was tasked with capturing Ruweisat Ridge, a dominant feature on the mostly flat terrain surrounding the area. Three days into the advance, C Company , which had been in reserve until that point, was tasked with reconnoitring up Ruweisat Ridge to ascertain the situation. Ignoring orders to send an officer, Charles set off in a jeep with a volunteer driver. After weaving through heavy fire and German tanks he found that the lead battalions were cut off and deep within enemy territory. Joining in the action, Charles later reported:
It was a very colourful show with flares going up, tanks firing red tracer bullets from machine guns. Two German tanks were put out by 18th Battalion with sticky bombs. They went up close to me. The German troops were being badly cut up while the Italians were surrendering in hundreds.
After reporting this back to Brigadier Burrows, commanding officer of the 20th Battalion, Charles returned to his position as the entire battalion moved forward to engage the enemy.
First encountering a German artillery position in a valley below Ruweisat Ridge, Charles led a frontal assault with C Company where he received a bullet wound which smashed his elbow, leaving it useless. Continuing on leading the attack with his arm hanging at his side, C Company took the position after a brief, violent action where 142 POWs were taken. Although the Ruweisat Ridge was taken by New Zealand forces, the Germans soon counterattacked with armour and overran the 22nd Battalion’s positions when promised armoured support failed to turn up. Attempting to return to the surrounded positions which C Company occupied from the regimental aid post later in the day, Charles received another shrapnel wound, this one to his leg by a mortar. Immobilised, Charles and 6 other survivors of the company were soon taken prisoner.
Although the fighting on the frontlines was over for Charles Upham, a new fight was set to begin, one which would pit him against his captors. Charles was sent to a makeshift hospital at Mersa Matruh, where he narrowly escaped having his shattered arm amputated. His first escape attempt at a nearby prison was cut short when he was found hiding in a roof cavity, whereupon he was shipped to a POW camp at Modena in Italy. After the capitulation of Italy, German forces rounded up the POWs and sent them north to Germany where Charles again attempted to escape, this time by sawing through the floor of a truck with a sharpened kitchen knife. When this failed, he simply threw himself off the truck and ran for it, being recaptured shortly afterwards. Two more attempts to escape Wensberg POW camp followed, earning Charles an internment at the infamous Colditz Castle. Unbroken and en route to Colditz, Charles flung himself from a speeding train and managed to avoid capture for twelve hours. The only 2nd New Zealand Division combatant officer to be sent to Colditz, Charles found life there more than frustrating, having to give up the idea of escaping as the POWs' Escape Committee refused to approve any ideas.
Upon being freed in April 1945 Charles was sent back to the UK where he was reunited with his fiancée, Molly McTamney, who was serving as a nurse. The two would marry later that year. In May, Charles attended an investiture at Buckingham Palace where he received his first Victoria Cross from King George VI. In September 1945, Upham received word that he had been awarded a second Victoria Cross for his actions at Minqar Qaim and Ruweisat Ridge. Recommendations and eyewitness accounts had been written out immediately after his capture at Ruweisat, but these were shelved until General Freyberg and Major-General Howard Kippenberger revived the question of a bar to the Victoria Cross after the war ended. The bar to the Victoria Cross was presented to Charles Upham by Governor-General Sir Syril Newall in a service in Christchurch in 1946, making Charles only the third individual, and only infantry officer, in history to have this honour bestowed upon them.
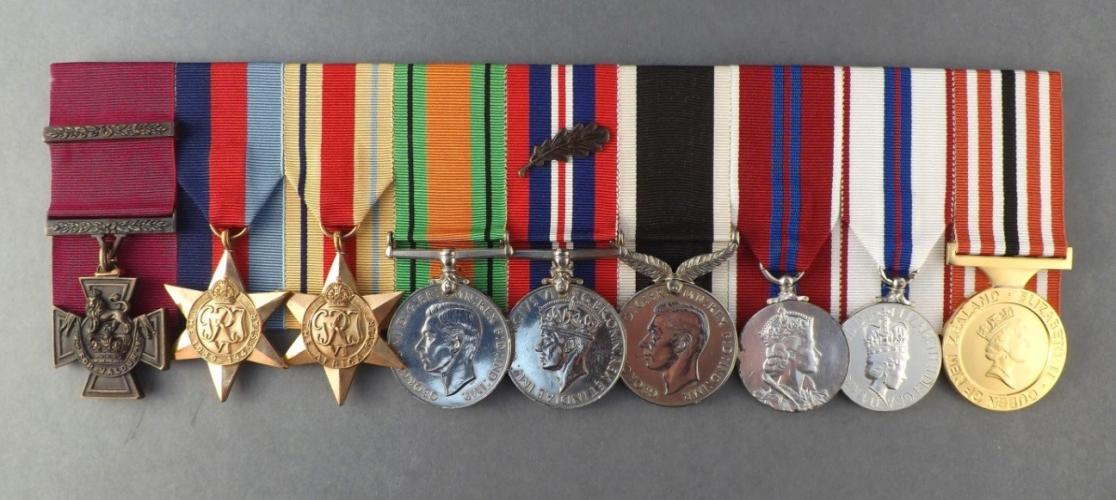
Humbled by the publicity and shunning any celebrity status, even refusing a knighthood at one point, Upham returned to a quiet civilian life in New Zealand. When the people of Canterbury raised over £10,000 to buy a farm for the Upham family, Charles refused and insisted it be put to a better use, thereby creating the Charles Upham Scholarship Fund. Later winning a returned serviceman’s ballot for a 400-hectare block in the remote Conway Flats district, he and wife Molly settled in to farming life and raised three daughters, eventually retiring to Christchurch in 1994 where he passed away. Charles Hazlitt Upham resides in a family plot with his wife Molly in St. Paul’s Papanui Cemetery, Christchurch. Charles’ medals are currently on loan to the National Army Museum, Waiouru.
Honours and Awards
- Victoria Cross with bar
- 1939-1945 Star
- Africa Star
- Defence Medal
- War Medal 1939-1945 with oak leaf
- New Zealand War Service Medal
- Coronation Medal 1953
- Silver Jubilee Medal 1977
- New Zealand 1990 Commemoration Medal
Citation for Victoria Cross, Gazetted 14 October 1941:
During the operations in Crete this officer performed a series of remarkable exploits, showing outstanding leadership, tactical skill and utter indifference to danger.
He commanded a forward platoon in the attack on Maleme on 22nd May and fought his way forward for over 3,000 yards unsupported by any other arms and against a defence strongly organised in depth. During this operation his platoon destroyed numerous enemy posts but on three occasions sections were temporarily held up.
In the first case, under a heavy fire from a machine gun nest he advanced to close quarters with pistol and grenades, so demoralizing the occupants that his section was able to "mop up" with ease.
Another of his sections was then held up by two machine guns in a house. He went in and placed a grenade through a window, destroying the crew of one machine gun and several others, the other machine gun being silenced by the fire of his sections.
In the third case he crawled to within 15 yards of an M.G. post and killed the gunners with a grenade.
When his Company withdrew from Maleme he helped to carry a wounded man out under fire, and together with another officer rallied more men together to carry other wounded men out.
He was then sent to bring in a company which had become isolated. With a Corporal he went through enemy territory over 600 yards, killing two Germans on the way, found the company, and brought it back to the Battalion's new position. But for this action it would have been completely cut off.
During the following two days his platoon occupied an exposed position on forward slopes and was continuously under fire. Second Lieutenant Upham was blown over by one mortar shell, and painfully wounded by a piece of shrapnel behind the left shoulder, by another. He disregarded this wound and remained on duty. He also received a bullet in the foot which he later removed in Egypt.
At Galatas on 25th May his platoon was heavily engaged and came under severe mortar and machine-gun fire. While his platoon stopped under cover of a ridge Second-Lieutenant Upham went forward, observed the enemy and brought the platoon forward when the Germans advanced. They killed over 40 with fire and grenades and forced the remainder to fall back.
When his platoon was ordered to retire he sent it back under the platoon Sergeant and he went back to warn other troops that they were being cut off. When he came out himself he was fired on by two Germans. He fell and shammed dead, then crawled into a position and having the use of only one arm rested his rifle in the fork of a tree and as the Germans came forward he killed them both. The second to fall actually hit the muzzle of the rifle as he fell.
On 30th May at Sphakia his platoon was ordered to deal with a party of the enemy which had advanced down a ravine to near Force Headquarters. Though in an exhausted condition he climbed the steep hill to the west of the ravine, placed his men in positions on the slope overlooking the ravine and himself went to the top with a Bren Gun and two riflemen. By clever tactics he induced the enemy party to expose itself and then at a range of 500 yards shot 22 and caused the remainder to disperse in panic.
During the whole of the operations he suffered from dysentery and was able to eat very little, in addition to being wounded and bruised.
He showed superb coolness, great skill and dash and complete disregard of danger. His conduct and leadership inspired his whole platoon to fight magnificently throughout, and in fact was an inspiration to the Battalion.
Citation for award of the bar to the Victoria Cross, Gazetted 26 September 1945:
Captain C. H. Upham, V.C., was commanding a Company of New Zealand troops in the Western Desert during the operations which culminated in the attack on El Ruweisat Ridge on the night of 14th–15th July, 1942.
In spite of being twice wounded, once when crossing open ground swept by enemy fire to inspect his forward sections guarding our mine-fields and again when he completely destroyed an entire truck load of German soldiers with hand grenades, Captain Upham insisted on remaining with his men to take part in the final assault.
During the opening stages of the attack on the ridge Captain Upham's Company formed part of the reserve battalion, but, when communications with the forward troops broke down and he was instructed to send up an officer to report on the progress of the attack, he went out himself armed with a Spandau gun and, after several sharp encounters with enemy machine gun posts, succeeded in bringing back the required information.
Just before dawn the reserve battalion was ordered forward, but, when it had almost reached its objective, very heavy fire was encountered from a strongly defended enemy locality, consisting of four machine gun posts and a number of tanks.
Captain Upham, without hesitation, at once led his Company in a determined attack on the two nearest strongpoints on the left flank of the sector. His voice could be heard above the din of battle cheering on his men and, in spite of the fierce resistance of the enemy and the heavy casualties on both sides, the objective was captured.
Captain Upham, during the engagement, himself destroyed a German tank and several guns and vehicles with grenades and although he was shot through the elbow by a machine gun bullet and had his arm broken, he went on again to a forward position and brought back some of his men who had become isolated. He continued to dominate the situation until his men had beaten off a violent enemy counter-attack and consolidated the vital position which they had won under his inspiring leadership.
Exhausted by pain from his wound and weak from loss of blood Captain Upham was then removed to the Regimental Aid Post but immediately his wound had been dressed he returned to his men, remaining with them all day long under heavy enemy artillery and mortar fire, until he was again severely wounded and being now unable to move fell into the hands of the enemy when, his gallant Company having been reduced to only six survivors, his position was finally overrun by superior enemy forces, in spite of the outstanding gallantry and magnificent leadership shown by Captain Upham.